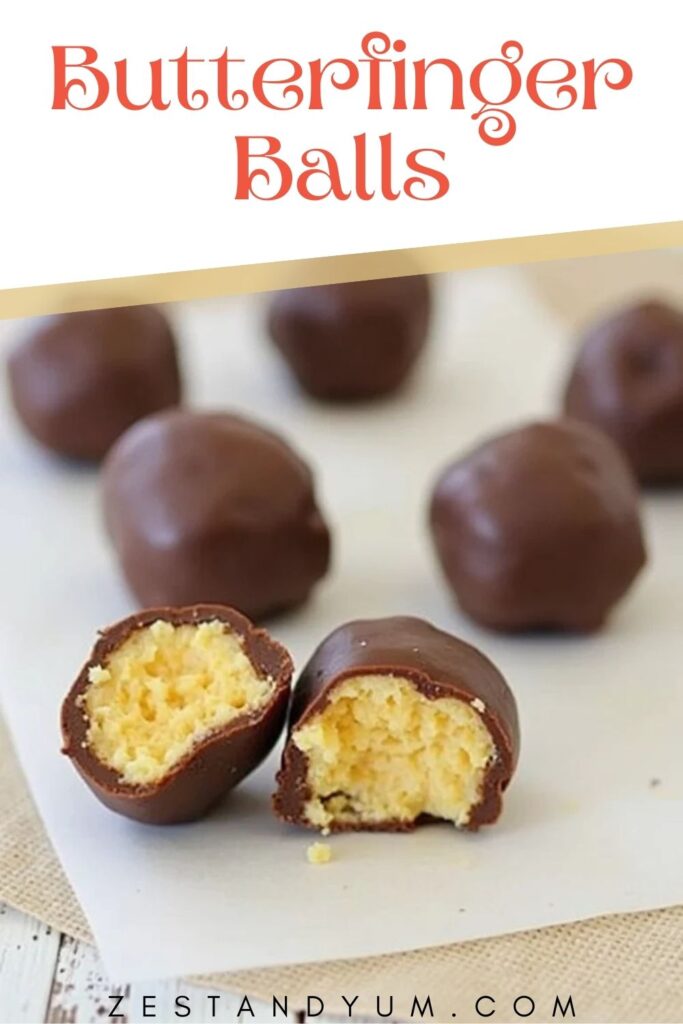
Delicious, peanut buttery, and incredibly easy to make Butterfinger Balls are the no-bake treat your dessert menu has been waiting for! Whether you’re prepping for a family gathering, a holiday party, or just a cozy night at home, these bite-sized goodies will quickly become a crowd favorite.
If you’re a fan of the classic Butterfinger candy bar, this recipe will take your dessert game to the next level. Sweet, crunchy, and completely customizable, Butterfinger Balls prove that satisfying your sweet tooth doesn’t have to be time-consuming or complicated. Let’s dive into everything you need to know about this fun and flavorful treat!
Why You’ll Love This Recipe
There are so many reasons to fall head over heels for Butterfinger Balls, but let’s start with the basics.
- Quick and Easy: No cooking? No baking? No problem! This recipe can be whipped up in a flash, making it perfect for beginners or anyone short on time.
- Minimal Ingredients: With just a handful of pantry staples, you can create a dessert that will wow friends and family.
- No-Bake Delight: Since this recipe doesn’t require an oven, you can keep things cool in the kitchen. Perfect for summer or when you just want a fuss-free dessert.
- Perfect for Sharing: Everyone loves finger food, and this recipe makes a batch large enough to share with loved ones or bring to a potluck.
- Customizable: Whether you’re vegan, gluten-free, or just looking to experiment, Butterfinger Balls can be tailored to suit your needs.
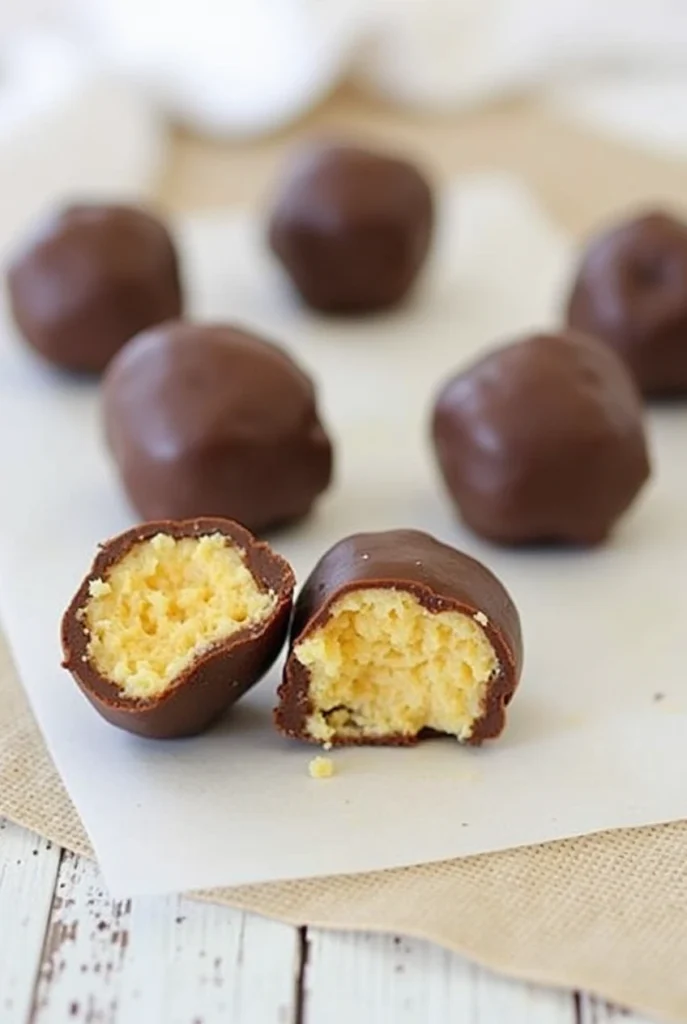
With their creamy peanut butter base, crispy Butterfinger crunch, and chocolatey coating, you’ll be reaching for this recipe over and over. Plus, this dessert is a fun way to elevate the nostalgic flavor of Butterfinger candy bars into an elegant treat!
Ingredients: What You’ll Need for Butterfinger Balls
Before heading into the kitchen, let’s round up all the essentials! Don’t worry you won’t need any fancy ingredients for this recipe.
Basic Ingredients:
- Peanut Butter (¾ cup): Smooth works best, but if you love a bit of texture, go for crunchy.
- Butterfinger Candy Bars (10–12 small bars or about 2½ cups crushed): The hero of the recipe! These add the signature crispy, peanut buttery flavor.
- Powdered Sugar (1 cup): Adds sweetness and binds everything together. Feel free to sift for a smoother base.
- Cream Cheese (4 oz, softened): Adds richness and keeps the mixture moist and creamy.
- Milk Chocolate Chips (1½ cups): Used for the outer coating. You can substitute with dark chocolate or white chocolate if preferred.
- Coconut Oil (1 tbsp): For a glossy chocolate coating.
Step-by-Step Instructions for Butterfinger Balls
Ready to whip up some buttery, crunchy magic? Let’s walk through the process step by step. Each section is broken down to make life in the kitchen a breeze.
Step 1: Crush the Butterfinger Bars
To get started, place your Butterfinger candy bars into a resealable plastic bag. Use a rolling pin or the bottom of a heavy glass to crush them into small pieces. Don’t pulverize them completely you’ll want to keep some chunks for texture.
(Pro Tip: Using a food processor will make this step even faster!)
Step 2: Mix the Base Ingredients
In a large mixing bowl, combine the softened cream cheese, peanut butter, and powdered sugar. Mix thoroughly until the ingredients form a smooth, cohesive dough-like consistency.
Once mixed, add in the crushed Butterfinger pieces. Gently fold everything together to distribute the candy crunch evenly.
Step 3: Form the Balls
Scoop out about a tablespoon of the mixture and roll it between your hands to form a ball. Continue this process until all the mixture is used. Place the formed balls onto a cookie sheet lined with parchment paper.
(Pro Tip: If the mixture gets too sticky, pop it into the fridge for about 10–15 minutes before rolling.)
Step 4: Chill the Balls
Refrigerate the balls for at least 30 minutes. This step helps them firm up and makes them easier to coat with chocolate later.
Step 5: Melt the Chocolate
In a microwave-safe bowl, combine the chocolate chips and coconut oil. Microwave in 15–20 second intervals, stirring in between, until the chocolate is fully melted and smooth.
(Pro Tip: Use a double boiler for more controlled chocolate melting.)
Step 6: Coat the Butterfinger Balls
Remove the chilled balls from the fridge. Using a fork or skewer, dip each ball into the melted chocolate, making sure it’s fully coated. Allow any excess chocolate to drip off before placing the balls back onto the parchment-lined sheet.
(Optional: Sprinkle extra crushed Butterfinger pieces on top before the chocolate hardens for added texture and pizzazz.)
Step 7: Chill Again
Once all the balls are coated, pop the tray back into the fridge for 20–30 minutes, or until the chocolate coating is completely set.
Step 8: Serve and Enjoy!
Your Butterfinger Balls are officially ready to shine! Serve them immediately, or store them in an airtight container for up to a week.
Expert Tips for Perfect Butterfinger Balls
Looking for ways to take your Butterfinger Balls recipe from good to unforgettable? These expert tips will help you nail it every time:
- Use Room-Temperature Ingredients: Working with softened cream cheese and peanut butter ensures that everything blends seamlessly.
- Chill Before You Dip: Don’t skip the chilling stages it makes rolling and dipping the balls so much easier.
- Experiment with Chocolate: Semi-sweet, dark, or white chocolate are all delicious coating options. For an extra layer of fun, drizzle contrasting chocolate on top after the first layer sets.
- Add a Crunch: Mix in some graham cracker crumbs or Rice Krispies cereal for an additional crunch.
- Work in Small Batches: If your kitchen is warm, dip the balls in smaller batches and keep the rest refrigerated while you work.
Variations: Ways to Customize Your Butterfinger Balls
One of the best things about Butterfinger Balls is how easy they are to tweak! Here are some creative ways to put your own spin on this classic recipe:
1. Make Them Vegan
- Swap cream cheese for a plant-based alternative.
- Use dairy-free chocolate chips.
- Try natural peanut butter for a cleaner ingredient list.
2. Gluten-Free Goodness
Ensure your Butterfinger candy bars and other ingredients are certified gluten-free!
3. Flavor Boost
- Add a splash of vanilla or almond extract to the mix.
- Stir in mini marshmallows or mini chocolate chips for added sweetness.
- Use almond butter, cashew butter, or cookie butter for a fun twist on the flavor profile.
4. Holiday-Themed Treats
- Add green and red sprinkles for Christmas, or pastel colors for Easter.
- Shape the balls into eggs for Easter or hearts for Valentine’s Day.
Serving Suggestions
So, you’ve just made the most addicting Butterfinger Balls, and now it’s time to serve them! Here’s how to make these treats even more special:
- Party Platters: Arrange them on a decorative dessert tray alongside other no-bake sweets like Oreo truffles or cake pops.
- Gift Boxes: Pack them in cute boxes or tins lined with parchment paper for thoughtful gifts.
- Ice Cream Toppers: Crush a few balls and sprinkle them over ice cream for an indulgent sundae.
- Coffee Pairing: Serve alongside coffee or hot cocoa for the ultimate cozy afternoon snack.
See Also:
FAQ: Frequently Asked Questions About Butterfinger Balls
1. Can I make these ahead of time?
Absolutely! Butterfinger Balls can be made a day or two in advance. As long as they’re stored in an airtight container in the refrigerator, they’ll stay fresh and delicious for up to a week.
2. Do they need to be refrigerated?
Yes, due to the cream cheese in the recipe, these treats should be kept refrigerated.
3. Can I freeze Butterfinger Balls?
Yes, they freeze beautifully! Store them in a freezer-safe bag for up to 3 months. Let them thaw in the refrigerator before serving.
4. What if I don’t have Butterfinger candy bars?
No Butterfingers? No problem! Substitute them with another candy bar of your choice, such as Reese’s Cups or Heath Bars.

Conclusion: A Must-Try Dessert!
Butterfinger Balls are truly a recipe worth trying. Whether you’re craving a fun treat to share or an indulgent snack to enjoy on your own, these no-bake wonders have everything you need crunch, creaminess, and sweet, chocolatey goodness.
So, what are you waiting for? Head to the kitchen, gather your ingredients, and get ready to enjoy the easiest dessert that everyone will rave about. Don’t forget to snap a photo and tag us on social media when you make these delightful bites. Happy no-baking!
Print
Easy No-Bake Butterfinger Balls
- Total Time: 1 hour 5 minutes
- Yield: 24 balls (depends on size) 1x
- Diet: Vegetarian
Description
Delicious, peanut buttery, and incredibly easy to make, Butterfinger Balls are the no-bake treat your dessert menu has been waiting for! With a creamy peanut butter base, crispy Butterfinger crunch, and chocolatey coating, this dessert is a fun way to elevate the nostalgic flavor of Butterfinger candy bars into an elegant treat. Perfect for parties, holidays, or a simple indulgence at home!
Ingredients
- ¾ cup Peanut Butter (smooth or crunchy)
- 10–12 small bars (about 2½ cups crushed) Butterfinger Candy Bars
- 1 cup Powdered Sugar (sifted for a smoother base)
- 4 oz Cream Cheese (softened)
- 1½ cups Milk Chocolate Chips (or substitute with dark or white chocolate)
- 1 tbsp Coconut Oil (for a glossy chocolate coating)
Instructions
- Crush the Butterfinger Bars – Place Butterfinger bars in a resealable bag and crush them into small pieces using a rolling pin or food processor.
- Mix the Base Ingredients – In a large mixing bowl, combine softened cream cheese, peanut butter, and powdered sugar. Mix until smooth, then fold in crushed Butterfinger pieces.
- Form the Balls – Scoop out tablespoon-sized portions and roll them into balls. Place on a parchment-lined baking sheet.
- Chill the Balls – Refrigerate for 30 minutes to help them firm up.
- Melt the Chocolate – In a microwave-safe bowl, melt chocolate chips and coconut oil in 15–20 second intervals, stirring between each until smooth.
- Coat the Balls – Dip each ball into the melted chocolate, ensuring full coverage. Let excess chocolate drip before placing them back on the parchment paper.
- Chill Again – Refrigerate for 20–30 minutes until the chocolate is fully set.
- Serve & Enjoy – Store in an airtight container in the fridge for up to a week or freeze for up to 3 months.
Notes
- Use room-temperature cream cheese and peanut butter for easier mixing.
- Chill before rolling and dipping for better results.
- Experiment with different chocolate coatings (semi-sweet, dark, white).
- Add crunch by mixing in graham cracker crumbs or Rice Krispies.
- For festive treats, top with sprinkles or shape them into seasonal designs.
- Prep Time: 15 minutes
- Cook Time: 50 minutes
- Category: Dessert, No-Bake Treats
- Method: No-Bake
- Cuisine: American
Nutrition
- Serving Size: 1 ball
- Calories: ~150 kcal
- Sugar: ~12g
- Sodium: ~50mg
- Fat: ~9g
- Saturated Fat: ~4g
- Unsaturated Fat: ~3g
- Trans Fat: 0g
- Carbohydrates: ~16g
- Fiber: ~1g
- Protein: ~2g
- Cholesterol: ~5mg