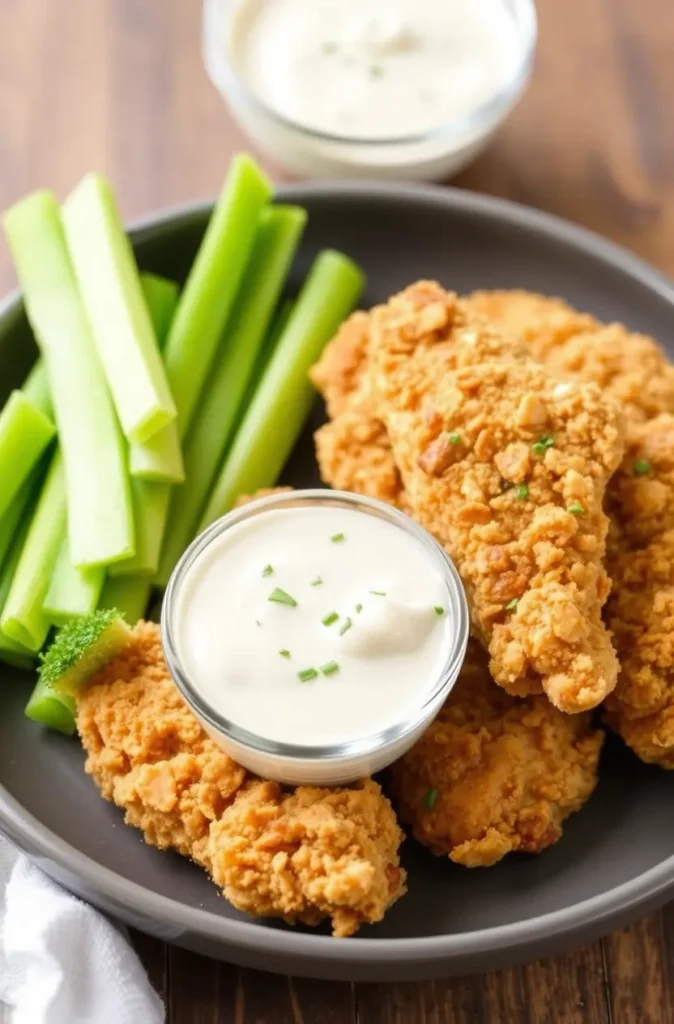
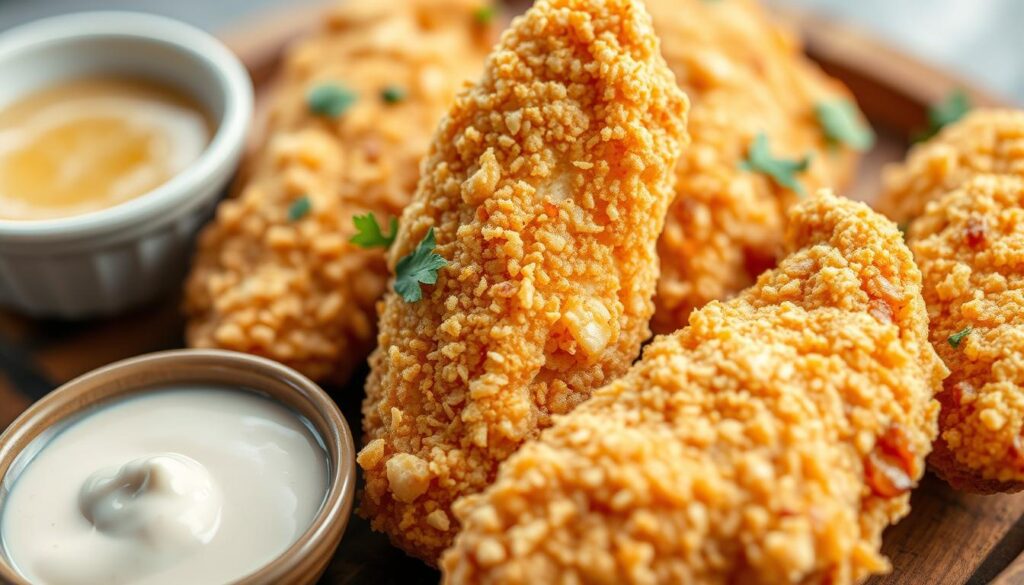
I’m a true Southerner, and I love our rich food traditions. Nothing beats the taste of crispy, juicy buttermilk chicken tenders. They’re the heart of Southern comfort food.
The tangy buttermilk makes the chicken tender. The crunchy coating adds a perfect texture. It reminds me of my childhood, enjoying meals with my family.
In this article, I’ll share my secret recipe for these amazing chicken tenders. You’ll learn how to make them tender yet crispy. It’s perfect for both experienced cooks and beginners.
Key Takeaways
- Buttermilk is the secret ingredient that tenderizes and adds rich flavor to the chicken.
- The right breading mixture and double-dredging technique create a delightfully crispy coating.
- Proper frying temperature and oil selection are crucial for achieving restaurant-quality results.
- Homemade dipping sauces take these buttermilk chicken tenders to the next level.
- Storage and reheating methods ensure your tenders stay fresh and crispy.
Why Buttermilk Makes the Perfect Chicken Marinade
Buttermilk is the secret to tender and flavorful chicken tenders. It’s a versatile dairy product that opens up a world of delicious possibilities for marinating chicken.
The Science Behind Buttermilk Tenderizing
Buttermilk’s acidic properties are its magic. The lactic acid breaks down chicken’s tough proteins, making it tender and juicy. Enzymes in buttermilk also soften the chicken’s muscle fibers.
Flavor-Enhancing Properties
A buttermilk marinade does more than tenderize meat. Its acidity opens up the chicken’s pores. This lets it soak up flavors from seasonings or herbs, making the chicken tender and full of taste.
Optimal Marination Time
- Marinate chicken in buttermilk for 30 minutes to 24 hours for the best results.
- Marinating too long can make the chicken mushy.
- The perfect marination time is 2-4 hours for tenderized chicken.
Using buttermilk can take your chicken tenders to a whole new level. Try it and see the difference for yourself!
Essential Ingredients for Restaurant-Quality Tenders
To make fried chicken tenders as tasty as your favorite restaurant, you need a few key ingredients. Start with fresh, high-quality chicken. Choose boneless, skinless chicken tenderloins or breasts for the best taste and texture.
Buttermilk is the secret to a crispy coating. It tenderizes the chicken and makes the breading stick perfectly. For the best flavor, marinate the chicken in buttermilk for at least 30 minutes. Or, for even better results, marinate it for up to 24 hours.
To make the perfect breading, use all-purpose flour seasoned with spices. Mix in garlic powder, paprika, cayenne pepper, and salt. This blend gives your homemade fried chicken a flavor that’s restaurant-quality.
| Ingredient | Purpose |
|---|---|
| Boneless, Skinless Chicken Tenderloins | Provides the ideal texture and juiciness for chicken recipes |
| Buttermilk | Tenderizes the chicken and helps the crispy coating adhere |
| All-Purpose Flour | Forms the base of the breading for a satisfyingly crunchy texture |
| Garlic Powder, Paprika, Cayenne Pepper, Salt | Seasoning blend that enhances the overall flavor of the fried chicken |
With these essential ingredients, you’re ready to make chicken tenders that rival your favorite restaurant’s dish.
My Secret Breading Mixture for Extra Crunch
Getting the perfect crispy coating on fried chicken tenders is an art. I’m excited to share my secret breading mixture. It will make your homemade crispy coating amazing. Your family and friends will love the restaurant-quality fried chicken tenders.
Seasoning Blend Components
The secret to a great seasoning blend is the right mix of spices and herbs. My recipe includes:
- Garlic powder
- Onion powder
- Paprika
- Cayenne pepper
- Dried thyme
- Salt and pepper
Double-Dredging Technique
The double-dredging technique is key for extra crunch. First, I coat the chicken in seasoned flour. Then, I dip it in buttermilk before coating it again in flour. This makes the breading stick well to the chicken, giving a crispy exterior.
Temperature Control Tips
Keeping the oil at the right temperature is important for a golden-brown crust. I use a deep-fry thermometer to keep the oil between 350°F and 375°F. This ensures the chicken cooks evenly and gets crispy on the outside.
Step-by-Step Guide to Buttermilk Chicken Tenders
Making delicious buttermilk chicken tenders at home is simple. Just follow this easy guide. You’ll soon enjoy buttermilk chicken tenders, chicken recipes, and fried chicken like a pro!
- Begin by marinating the chicken tenders in buttermilk. The buttermilk’s acidity tenderizes the meat, making it juicy and flavorful.
- Drain the chicken and pat it dry with paper towels after marinating for at least 30 minutes. This helps the breading stick well.
- In a shallow bowl, mix your favorite seasoning blend. A good mix includes paprika, garlic powder, onion powder, salt, and pepper.
- Dredge the chicken tenders in the seasoned flour mixture. Make sure they’re evenly coated on all sides.
- Heat a lot of oil in a large skillet or Dutch oven to 350°F. Add the breaded chicken tenders in batches, avoiding overcrowding.
- Fry the chicken for 2-3 minutes per side, until it’s golden brown and cooked through. Keep the heat right for the best results.
- Place the fried chicken tenders on a paper towel-lined plate to drain excess oil. Add more salt if you like.
- Enjoy your buttermilk chicken tenders hot and crispy with your favorite dipping sauces. It’s a treat!
This guide makes it easy to create chicken recipes fit for a restaurant. The secret is the buttermilk marinade and careful frying. Follow these steps for fried chicken that’s crispy outside and juicy inside every time.
Best Oil Types and Frying Temperature Guide
Getting the perfect crispy coating on homemade fried chicken tenders is all about the right oil and temperature. We’ll explore the best oils and how to keep the temperature just right. This way, your fried chicken tenders will taste like they came from a restaurant.
Oil Selection Guidelines
The best oil for frying should have a high smoke point and a neutral taste. Here are some top picks:
- Peanut oil – with a smoke point of 450°F, it’s perfect for high-heat frying without burning.
- Vegetable oil – versatile and can handle high frying temperatures without adding unwanted flavors.
- Canola oil – neutral-tasting with a smoke point of 400°F, ideal for frying chicken tenders.
Stay away from olive oil and butter. They burn easily at the high temperatures needed for crispy fried chicken.
Temperature Monitoring Methods
Keeping the oil at the right temperature is key for crispy fried chicken. Use a deep-fry or candy thermometer to check the oil’s temperature. It should be between 350-375°F. This ensures the outside gets crispy while the inside cooks evenly.
Batch Sizing Recommendations
Frying in small batches helps keep the oil temperature steady. Too many tenders at once can lower the temperature, making them soggy. Fry 4-5 tenders at a time to maintain the best frying temperature.
By choosing the right oil, monitoring the temperature, and frying in batches, you’ll get crispy, golden-brown fried chicken tenders every time.
Irresistible Homemade Dipping Sauces
Elevate your buttermilk chicken tenders with delicious homemade dipping sauces. These sauces not only enhance the tenders but also make great appetizers or kid-friendly meals. Let’s dive into some irresistible options that will make you want more.
Honey Mustard Delight
This mix of sweet and tangy is loved by all. Mix equal parts honey and Dijon mustard, then add mayonnaise for creaminess. It’s a sauce that balances the bold flavors of the dipping sauces perfectly.
Ranch Revival
Try a homemade ranch dressing for a cool, refreshing taste. Mix plain yogurt or sour cream with fresh herbs like dill and chives, garlic powder, and a bit of lemon juice. This dipping sauces mix of tangy and herbal notes goes great with the crispy buttermilk coating.
Barbecue Bliss
For a smoky-sweet flavor, make a homemade barbecue sauce. Begin with ketchup or tomato paste, then add brown sugar, Worcestershire sauce, and spices like chili powder and paprika. The caramelized flavors of this dipping sauces will take your buttermilk chicken tenders to the next level.
Try these and other dipping sauces to find the best match for your buttermilk chicken tenders. Whether as appetizers or part of a kid-friendly meals, these homemade sauces will make your dish irresistible.
Storage Tips and Reheating Methods
Enjoying crispy, flavorful buttermilk chicken tenders doesn’t have to end when the meal is over. You can keep the tender and crunchy goodness for later with the right storage and reheating. Let’s explore how to store and revive those delicious chicken tenders.
Proper Storage Techniques
To keep your buttermilk chicken tenders crispy and juicy, proper storage is crucial. Here are some tips to help:
- Refrigerate leftover tenders in an airtight container for up to 3 days. This keeps their texture and flavor fresh.
- For longer storage, freeze the cooked tenders in a single layer on a baking sheet. Then, transfer them to a freezer-safe bag or container. They’ll stay good for up to 3 months in the freezer.
- Always let the tenders cool completely before storing. This prevents soggy results from condensation.
Maintaining Crispiness When Reheating
Reheating your storage-savvy chicken tenders is easy with the right methods. Try these to bring back their signature crunch:
- Oven Reheating: Preheat your oven to 400°F (200°C). Place the tenders on a baking sheet and heat for 8-10 minutes, flipping halfway, until crispy.
- Air Fryer Reheating: Put the tenders in your air fryer at 400°F (200°C) for 4-6 minutes, shaking halfway, for a quick reheat.
With these storage tips and reheating methods, you can enjoy your buttermilk chicken tenders long after the first meal. Savor every bite, even when reheating leftovers!
Common Mistakes to Avoid When Making Chicken Tenders
When making buttermilk chicken tenders, it’s easy to make mistakes. But don’t worry, I’ve got some tips to help you avoid them. This way, you can make restaurant-quality chicken tenders every time.
First, don’t over-marinate your chicken. Buttermilk is great for tenderizing, but too long can make the tenders mushy. Marinate for 30 minutes to an hour for the best taste and texture.
Another mistake is not checking the oil temperature. If it’s too cool, your tenders will be greasy. If it’s too hot, they’ll burn before they’re fully cooked. Use a thermometer to keep the oil at 350-375°F. Also, make sure to coat the chicken well in the breading. My double-dredging method will help you get that perfect crunch.
FAQ
What makes buttermilk the perfect marinade for chicken tenders?
Buttermilk tenderizes chicken tenders and adds flavor. Its acidity breaks down chicken proteins, making it moist and tender. The tangy taste of buttermilk complements the savory chicken perfectly.
How long should I marinate the chicken tenders in buttermilk?
Marinate chicken tenders in buttermilk for 30 minutes to 1 hour. This lets the buttermilk fully penetrate the meat. Avoid over-marinating to prevent the chicken from becoming too tender.
What ingredients are essential for achieving restaurant-quality crispy chicken tenders?
For crispy chicken tenders, use high-quality chicken, buttermilk, and a seasoned flour mixture. Fresh, boneless, skinless chicken tenders are essential. The buttermilk marinade tenderizes the meat, while the seasoned flour creates a crunchy exterior.
What’s the secret to your extra-crunchy breading mixture?
My secret is a blend of flour, cornstarch, and spices like paprika and garlic powder. Cornstarch makes the coating extra crispy. The seasoning adds flavor. I use a double-dredging technique for extra crunch.
What’s the best oil to use for frying chicken tenders and what temperature should I maintain?
Use peanut, vegetable, or canola oil for crispy tenders. Keep the oil between 350°F and 375°F. Use a thermometer to monitor the temperature and adjust as needed. This ensures even cooking and a crispy exterior.
What are some tasty dipping sauce options to serve with the chicken tenders?
Serve with honey mustard, ranch, or zesty barbecue sauce. Honey mustard and ranch complement the chicken well. Barbecue sauce adds a smoky-sweet contrast. These sauces elevate the tenders.
How can I store leftover chicken tenders and reheat them without losing their crispiness?
Cool the chicken tenders, then store them in an airtight container in the fridge for up to 3 days. Reheat in a 400°F oven for 8-10 minutes, or in an air fryer at 400°F for 5-7 minutes. This keeps them crispy without drying out.
What are some common mistakes to avoid when making buttermilk chicken tenders?
Avoid over-marinating, which can make the chicken mushy. Also, don’t let the oil temperature drop during frying. Don’t overcrowd the pan to prevent greasy, unevenly cooked tenders. Attention to these details ensures perfectly crispy, juicy chicken tenders.
Print
Crispy Buttermilk Chicken Tenders You’ll Love
- Total Time: 55 minutes
- Yield: 4 servings 1x
Description
Discover the secret to making crispy, tender buttermilk chicken tenders at home. This Southern-inspired recipe features a tangy buttermilk marinade, a perfectly seasoned coating, and foolproof frying tips for restaurant-quality results. Perfect for family dinners, appetizers, or kid-friendly meals!
Ingredients
· For the Chicken
-
- 1 lb boneless, skinless chicken tenderloins
- 1 cup buttermilk
· For the Coating
-
- 1 cup all-purpose flour
- 1/4 cup cornstarch
- 1 tsp garlic powder
- 1 tsp onion powder
- 1 tsp paprika
- 1/2 tsp cayenne pepper
- 1/2 tsp dried thyme
- Salt and black pepper (to taste)
· For Frying
-
- 3–4 cups peanut, vegetable, or canola oil
Instructions
1. Marinate the Chicken:
-
- Place chicken tenderloins in a bowl. Pour buttermilk over them, ensuring they’re fully coated.
- Cover and refrigerate for at least 30 minutes (or up to 4 hours).
2. Prepare the Coating:
-
- In a shallow bowl, mix flour, cornstarch, garlic powder, onion powder, paprika, cayenne pepper, dried thyme, salt, and pepper.
3. Double-Dredge the Chicken:
-
- Remove chicken from the marinade, letting excess buttermilk drip off.
- Coat each tenderloin in the seasoned flour mixture.
- Dip it back into the buttermilk, then coat it again in the flour mixture.
4. Heat the Oil:
-
- In a deep skillet or Dutch oven, heat oil to 350°F. Use a thermometer for accuracy.
5. Fry the Chicken:
-
- Fry chicken tenderloins in batches, 2-3 minutes per side, until golden brown and fully cooked. Avoid overcrowding the pan.
- Transfer cooked tenders to a paper towel-lined plate to drain excess oil.
6. Serve and Enjoy:
-
- Serve hot with your favorite dipping sauces such as honey mustard, ranch, or barbecue.
Notes
- Avoid marinating the chicken for more than 24 hours to prevent a mushy texture.
- For extra crispiness, use cornstarch in the coating.
- Fry in small batches to maintain oil temperature and ensure even cooking.
- Prep Time: 40 minutes (includes 30 minutes marinating)
- Cook Time: 15 minutes
- Category: Main Course
- Method: Frying
- Cuisine: Southern
Nutrition
- Serving Size: 1/4 recipe (approx. 4 tenders)
- Calories: 400
- Sugar: 1g
- Sodium: 600mg
- Fat: 20g
- Saturated Fat: 3g
- Unsaturated Fat: 16g
- Trans Fat: 0g
- Carbohydrates: 30g
- Fiber: 2g
- Protein: 25g
- Cholesterol: 70mg


