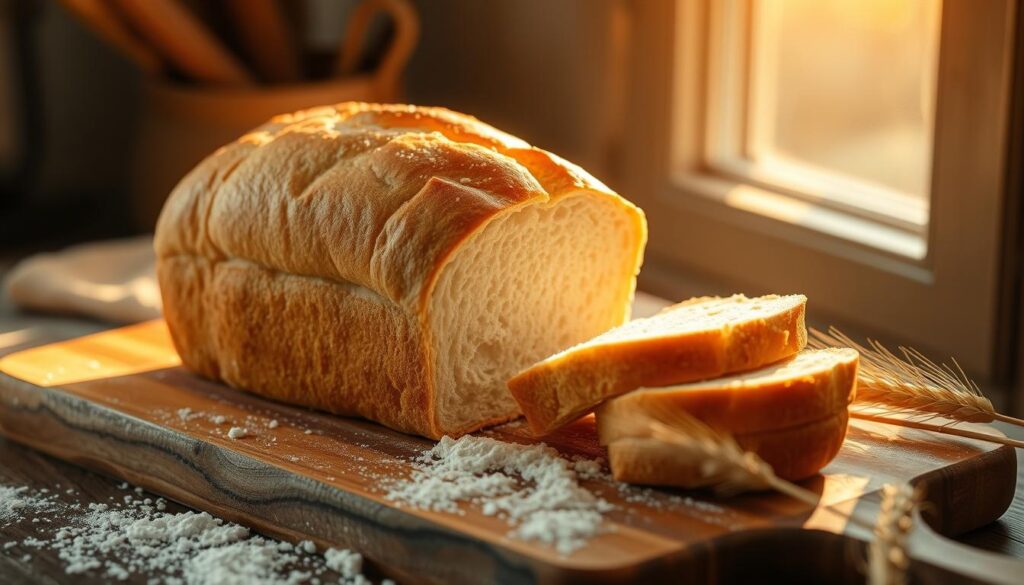
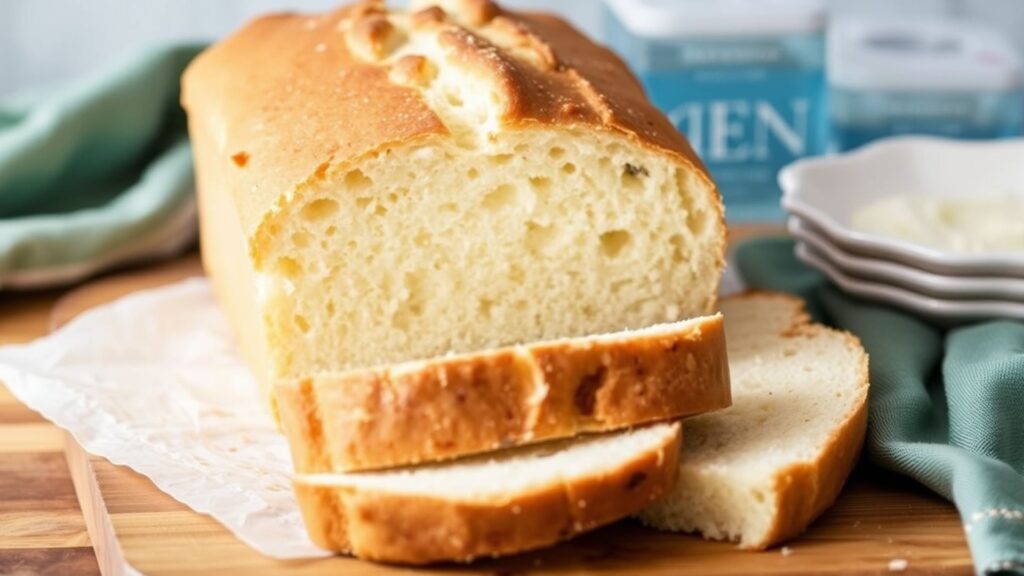
Imagine the smell of fresh bread in your kitchen. The soft texture and the joy of making it yourself. Homemade white bread is easy to make and very rewarding.
In this article, I’ll show you how to bake your own golden-crusted loaves. It’s simple and fun to do at home.
Key Takeaways
- Homemade white bread is surprisingly easy to make with just a few basic ingredients.
- Baking your own bread offers superior taste, texture, and satisfaction compared to store-bought options.
- The process of bread making involves fascinating scientific principles that are fun to learn.
- With the right tools and techniques, you can achieve perfect loaves every time.
- Homemade bread has a longer shelf life and can be customized to your preferences.
The Magic of Homemade White Bread Making
Making your own white bread at home is magical. It’s cheaper than buying it and lets you control what goes into it. Plus, it’s a fun way to relax and enjoy the bread baking process.
Why Baking Your Own Bread is Worth It
Homemade white bread is better because it’s free from bad stuff. You know what you’re eating. And there’s nothing like the joy of baking a fresh loaf.
Understanding the Science Behind Bread Making
Baking bread is all about gluten and yeast. Kneading makes the dough soft. Yeast makes it rise. This mix creates the perfect taste and texture.

Learning about bread baking helps you make perfect loaves. Paying attention to fermentation and oven temperature is key.
Essential Ingredients for Easy Homemade White Bread
Making delicious homemade white bread is simpler than you might think. Knowing the key ingredients and their roles is crucial. Whether you’re new to baking or experienced, learning the basics of homemade white bread opens up a world of possibilities.
All-purpose flour is at the heart of any simple bread recipe. It gives the loaf its classic white bread texture. The amount of flour needed can vary based on your kitchen’s humidity, so knead the dough until it’s just right.
Yeast is another essential ingredient. You can use active dry yeast or instant yeast. The type you choose affects the bread’s rising time and flavor. Yeast turns the dough’s sugars into carbon dioxide, making the bread rise and giving it a light, airy texture.
To add flavor and aroma, a pinch of salt and a bit of sugar are often used. Salt brings out the other flavors, while sugar feeds the yeast and helps with browning. A small amount of fat, like butter, oil, or shortening, also makes the bread soft and tender.
With these ingredients, you’re ready to bake a delicious loaf of homemade white bread. Try different techniques and ingredient ratios to find your favorite simple bread recipe.

| Ingredient | Function | Quantity for a Standard Loaf |
|---|---|---|
| All-Purpose Flour | Provides structure and texture | 3 to 4 cups |
| Yeast | Responsible for rising and leavening | 1 to 2 teaspoons |
| Salt | Enhances flavor | 1 to 2 teaspoons |
| Sugar | Feeds the yeast and aids browning | 1 to 2 tablespoons |
| Fat (butter, oil, or shortening) | Contributes to soft, tender texture | 1 to 2 tablespoons |
| Water | Binds the ingredients together | 1 to 1 1/2 cups |
Required Kitchen Tools and Equipment
To bake delicious homemade white bread at home, you need the right tools. The basics are simple, but the right equipment makes baking easier and more fun.
Basic Tools Every Bread Baker Needs
- Mixing bowls in various sizes
- Measuring cups and spoons
- Wooden spoon or sturdy spatula for mixing
- Baking sheet or loaf pan
- Parchment paper or silicone baking mat
- Serrated knife for slicing bread
- Digital kitchen scale (optional but very helpful)
Optional Equipment for Advanced Baking
For advanced bakers, some extra tools can be very helpful:
- Stand mixer with dough hook attachment
- Bread machine for hands-off mixing and kneading
- Bench scraper for shaping and portioning dough
- Lame or razor blade for scoring loaves
- Baking stone or steel for crispy crusts
- Spray bottle for creating steam in the oven
Proper Storage Solutions
Storing your freshly baked homemade white bread right is key. Keep it in an airtight container at room temperature for up to 5 days. For longer storage, freeze sliced or whole loaves for up to 3 months.
| Tool or Equipment | Purpose |
|---|---|
| Mixing Bowls | For mixing and kneading dough |
| Measuring Cups and Spoons | Ensuring accurate ingredient measurements |
| Wooden Spoon or Spatula | Mixing and folding dough during preparation |
| Baking Sheet or Loaf Pan | Baking the shaped dough into a loaf of bread |
| Parchment Paper or Silicone Mat | Preventing sticking and easy transfer of dough |
| Serrated Knife | Slicing the baked bread without crushing it |
| Digital Kitchen Scale | Measuring ingredients by weight for consistency |
Step-by-Step Mixing and Kneading Process
Making the perfect easy homemade white bread begins with knowing how to mix and knead. This step is key to creating a bread that’s light, airy, and tasty.
First, get all your ingredients ready and clear your workspace. Mix the dry stuff like flour, yeast, and salt in a big bowl. Then, add the wet stuff like water, milk, and other liquids slowly. This will make a dough that’s a bit rough.
- Knead the dough for about 10-15 minutes. Use your heel to push and fold it. This helps the dough get strong and fluffy.
- Watch the dough as you knead. Add flour or water if it’s too sticky or too dry. You want it to be smooth and stretchy.
- When you can stretch a piece of dough thin enough to see through it without it breaking, kneading is done.
Getting the kneading right is key for your easy homemade white bread to turn out right. With a bit of practice, you’ll get the hang of it. Then, you’ll make a great bread recipe every time.
| Kneading Duration | Dough Texture | Gluten Development |
|---|---|---|
| 10-15 minutes | Smooth and elastic | Well-developed |
| Less than 10 minutes | Rough and sticky | Underdeveloped |
| More than 15 minutes | Dense and tough | Overly developed |
The secret to great easy homemade white bread is mastering the mix and knead. With patience and focus, you’ll make a bread that everyone will enjoy.
The Art of Proper Dough Fermentation
Making the perfect homemade bread is more than just mixing and baking. The fermentation process is key for flavor, texture, and structure. Knowing the science behind it is crucial for great bread baking at home.
Understanding First and Second Rise
The first rise, or bulk fermentation, builds the dough’s structure and flavor. Yeast eats the sugars, making carbon dioxide and alcohol. This makes the dough expand and smell amazing.
The second rise, or proofing, improves the dough’s texture and look. Yeast keeps working, making the dough soft and airy. It also makes the loaf look great.
Temperature and Timing Considerations
The temperature and timing of fermentation are very important for homemade bread. The first rise should be between 75°F and 85°F. The second rise is best at 70°F to 80°F.
The time for each rise varies. It depends on the recipe, temperature, and humidity. Generally, the first rise is 1 to 2 hours. The second rise is 30 minutes to 1 hour. Watch the dough’s size and look to know when to move on.
Learning about dough fermentation can help you make amazing bread baking at home. With the right temperature, timing, and care, your bread will be full of flavor and texture.
Shaping Techniques for Perfect Loaves
Making a beautifully shaped loaf of white bread is an art. It can make your homemade easy bread recipe stand out. The way you shape the dough affects its texture, rise, and look. Let’s look at some key shaping techniques to get perfect loaves every time.
Creating tension on the dough’s surface is crucial. This is done by gently tucking and rolling the dough into a tight ball. The goal is to get a tight outer layer that keeps the shape during rising and baking. Here’s how to do it:
- Gently punch down the risen dough to release air bubbles.
- Use your hands to gather the dough into a rough ball, tucking edges underneath for a smooth surface.
- Roll the dough ball on a lightly floured surface, applying gentle pressure to make it even and tight.
- Transfer the shaped dough to a greased loaf pan, seam-side down.
Sealing the seams is also key. It prevents the dough from splitting or unraveling during baking. To seal, pinch and roll the dough along the seam to make a tight closure.
Good shaping not only makes your white bread look great. It also changes the texture. A well-shaped loaf will rise evenly, giving you a soft interior and a golden, crisp crust. With practice, you’ll be shaping like a pro in no time!
Baking Tips for Golden-Brown Crust
Getting a perfect golden-brown crust is key to a great homemade white bread. To get that beautiful, crisp exterior, follow some important baking tips.
Optimal Oven Temperature Settings
The best oven temperature for baking white bread is between 400°F and 450°F. This high heat helps the bread get a deep, caramelized crust. It also makes sure the inside is cooked right. Don’t make the temperature too low, or your crust will be pale and soft.
Steam and Moisture Control
Adding steam to the oven at the start is a big help for the crust. The steam makes the dough’s surface shiny and crackly. You can do this by putting a pan of hot water on the bottom rack of your oven.
It’s also important to keep the right moisture level. As the bread bakes, the crust should get drier and firmer. To stop the crust from getting too hard or cracking, mist the loaf with water halfway through baking.
Visual Doneness Indicators
- The crust should be a deep, golden-brown color.
- The loaf should sound hollow when tapped on the bottom.
- The internal temperature of the bread should reach 200°F to 205°F.
Remember these tips to make homemade white bread with a crispy and tasty crust every time.
Common Troubleshooting and Solutions
Baking homemade white bread can be rewarding but comes with challenges. As a bread enthusiast, I’ve faced many issues. I’ve learned how to fix them. Here, I’ll share solutions to help you bake great bread every time.
Dense or Heavy Texture
If your bread is dense and heavy, there are a few reasons. Make sure you proof the dough long enough. Also, check your yeast and knead well to develop gluten.
Uneven Rising
Uneven rising can be fixed easily. Keep your dough at the right temperature. Be gentle when handling the dough to keep air pockets.
Pale or Underbaked Crust
For a golden crust, adjust oven temperature and time. Make sure your oven is preheated well. Try misting the dough or adding hot water to the oven for steam.
| Common Issue | Possible Causes | Solutions |
|---|---|---|
| Dense or Heavy Texture | Underproofing Stale or inactive yeast Improper kneading | Proof the dough for the recommended time Check yeast for freshness Knead the dough thoroughly to develop gluten |
| Uneven Rising | Improper dough temperature Rough handling of the dough | Maintain the recommended dough temperature during rising Handle the dough gently to avoid deflating air pockets |
| Pale or Underbaked Crust | Incorrect oven temperature Insufficient baking time Lack of steam in the oven | Preheat the oven to the appropriate temperature Extend the baking time as needed Add a pan of hot water to the oven to create steam |
By tackling these common problems, you’ll bake delicious white bread. Your family and friends will love it. Keep trying and adjust your methods to find what works best for you.
Storage Methods and Shelf Life Tips
Being a homemade white bread baker is very rewarding. There’s nothing like biting into a warm slice right from the oven. But, keeping your bread fresh is key. I’ll share my best tips to help you store your homemade white bread.
For short-term storage, keep your loaf at room temperature. You can place it on the counter or in a bread box. This keeps it soft and prevents it from drying out. Enjoying it within a few days works best with this method.
If you want to keep your bread longer, refrigerate it. Use a resealable bag or airtight container to slow down staling and mold. This way, you can enjoy it for up to a week. But, refrigeration might make the bread less fluffy.
FAQ
What are the key ingredients needed to make homemade white bread?
To make homemade white bread, you need a few key ingredients. These include all-purpose flour, active dry yeast, and warm water. You’ll also need sugar, salt, and a bit of butter or oil.
How long does it take to make homemade white bread?
Making a loaf of homemade white bread takes about 2-3 hours. This includes the time for rising and baking. The actual time spent working on the bread is less than 30 minutes.
Do I need any special equipment to bake homemade white bread?
You’ll need basic equipment to bake homemade white bread. This includes a large mixing bowl, a wooden spoon or dough hook, and a baking sheet or loaf pan. An oven is also necessary. While a stand mixer or bread machine can help, they’re not required for delicious homemade bread.
How do I achieve the perfect crust on my homemade white bread?
For a golden-brown, crispy crust, bake your bread at 375°F. Adding ice cubes to the oven can help create steam, which is good for the crust. Brushing the loaf with an egg wash or melted butter before baking can also improve the crust.
How do I store homemade white bread to keep it fresh?
To keep your bread fresh, let it cool completely before slicing and storing. Store it in an airtight container at room temperature for 4-5 days. You can also freeze it for up to 3 months by wrapping it tightly in plastic wrap or foil.
What are some common issues I might encounter when baking homemade white bread?
You might face issues like a dense texture, uneven rising, or a pale crust. These problems can often be fixed by adjusting how you knead, the proofing times, or the oven temperature. Making small changes can help you get the perfect loaf.
Print
Easy Homemade White Bread
- Total Time: 2–3 hours (including rising times)
- Yield: 1 loaf
- Diet: Vegetarian
Description
Imagine the smell of fresh bread in your kitchen: the soft texture and the joy of making it yourself. This simple homemade white bread recipe is easy to follow and incredibly rewarding, perfect for both beginners and seasoned bakers.
Ingredients
- All-Purpose Flour: 3 to 4 cups (structure and texture)
- Yeast: 1 to 2 teaspoons (rising and leavening)
- Salt: 1 to 2 teaspoons (enhances flavor)
- Sugar: 1 to 2 tablespoons (feeds yeast, aids browning)
- Fat (butter, oil, or shortening): 1 to 2 tablespoons (soft and tender texture)
- Water: 1 to 1 ½ cups (binds ingredients together)
Instructions
- Prep Ingredients: In a large bowl, mix flour, yeast, and salt. Gradually add water and fat until a rough dough forms.
- Kneading: Knead for 10–15 minutes until smooth and elastic. Adjust with flour or water if needed.
- First Rise: Cover dough and let it rise in a warm place for 1–2 hours until doubled in size.
- Shaping: Punch down the dough, shape it into a loaf, and transfer it to a greased loaf pan.
- Second Rise: Let the shaped dough rise for 30 minutes to 1 hour until slightly puffed.
- Baking: Preheat oven to 400°F (200°C). Bake for 25–30 minutes or until golden brown.
- Cooling: Remove from the oven and cool on a wire rack before slicing.
Notes
- For a crispier crust, place a pan of hot water in the oven to create steam.
- Ensure proper kneading for optimal gluten development.
- Prep Time: 15 minutes
- Cook Time: 30 minutes
- Category: Baking
- Method: Oven
- Cuisine: American
Nutrition
- Serving Size: 1 slice (based on 12 slices)
- Calories: ~120
- Sugar: ~1g
- Sodium: ~200mg
- Fat: ~1.5g
- Saturated Fat: ~0.5g
- Unsaturated Fat: ~1g
- Trans Fat: 0g
- Carbohydrates: ~22g
- Fiber: ~1g
- Protein: ~3 g
- Cholesterol: 0mg


